


Jeans are a fashion essential, and more so are good fitting jeans. But styles change and your once trendy jeans are now today’s fashion passé. You can just get rid of your old jeans and buy new ones, or you can try the suggestions below and breathe new life and purpose to your jeans.
1. Placemat
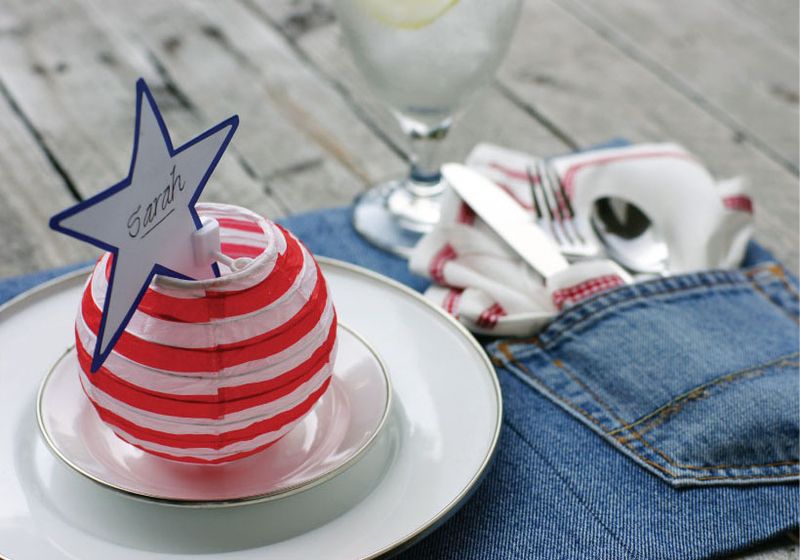
Jeans make a perfect sturdy yet stylish coaster. The pocket provides an authentic pocket for holding the cutlery and napkin.
What you’ll need: adult jeans, kid’s jeans, backing fabric, seam ripper, scissors or rotary cutter, no-sew fabric adhesive tape, iron, and sewing machine.
Remove the back pockets from the kid’s jeans using a seam ripper.
Cut out large back and front panels minus the seam from the adult jeans. Then reshape the panels into a symmetrical rectangle and discard the excess. Sew the panels together with a ½-inch seam allowance to make one huge panel measuring 20 inches wide. Press the seams flat with an iron.
Measure and cut the placemat top 2 inches bigger than the overall desired size. Most placemats measure 18-inches by 14 inches. Using this measurement, you should measure and cut a 20-inch by 18-inch panel.
Fold a ½-inch hem on each edge of the denim panel. Fold over another ½-inch and press flat with an iron. Then using a no-sew fabric adhesive tape, attach the pocket at the bottom right hand corner of the denim panel.
Cut the backing fabric to the exact measure of the overall desired measurement. Then turn the panel over and insert the backer. Stick the short sides using the no-sew tape. Press with an iron to make the fabric stick together. Cut away some fabric at the corners to remove some of the bulk. Finally, fold over the long edges and stick with no-sew tape. Use the iron to make sure the fabric sticks together.
2. Wine Bag

You won’t need a mastery of sewing skills to put together this chic wine bag.
What you’ll need: old jeans, ribbon (1 yard long), fabric glue, scissors, seam ripper, wine bottle, and sewing machine.
Lay the jeans flat out and place the bottle on the lower leg. Position the bottle so that the top is about 3 inches down from the hem.
Cut the leg 1 inch from the bottom of the bottle. Turn the leg inside out then sew the cut opening with a 5/8-inch seam allowance. Turn the bag right side out and press with an iron to flatten the seam.
Remove the back pocket with a seam ripper. Then on its backside apply a bead of fabric glue on the outer edge and stick the pocket to the wine bag, about 2 inches from the bottom. Let the glue dry thoroughly.
Place the wine bottle in the bag, put a wine opener in the pocket and tie a ribbon around the neck of the bottle.
3. Pot Holders
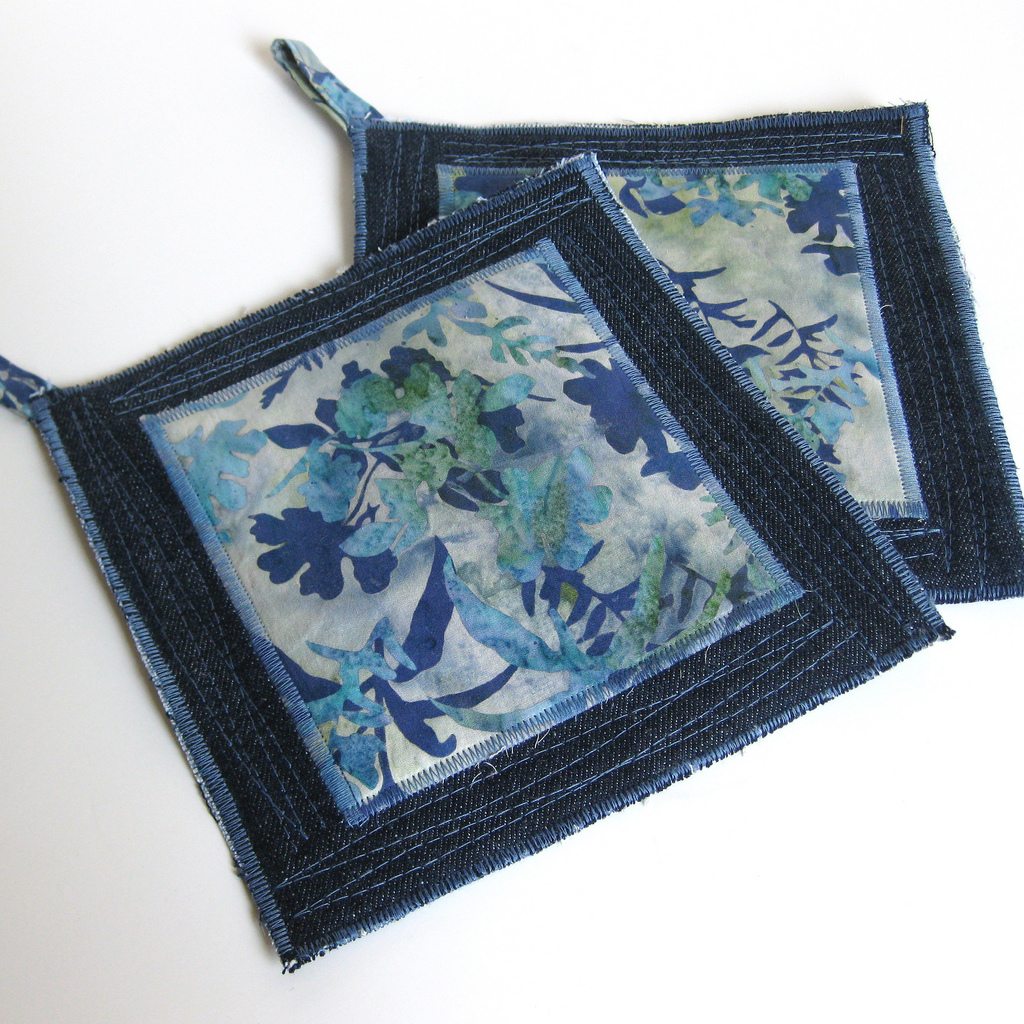
Your jeans have protected you through rain, heat and hale. Now it’s time for your jeans to protect your hands as you’re bustling around the kitchen.
What you’ll need: 2 back pockets, fleece for the batting, decorative fabric, and another fabric of contrasting color.
Cut around the back pocket whilst leaving as much space as you can, then neaten up the edges. Cut the same size from your fleece and your decorative fabric you’re going to use on the other side of the holder.
Then cut several 2.5-inch strips from your fabric with a contrasting color. This will be used for the binding around the edge. Your strips should total in length the distance all the way around the holder plus a few inches more for the hook.
Pin the fleece to the decorative fabric then stitch them together. Next pin this to the back pocket with the decorative fabric facing outwards. Stitch and secure the back pocket part with the fleece parts.
Stitch together the strips of fabric for the binding to make one long strip. Then with an iron, press the strip in half lengthways. Open up the strip again and then fold in the edges towards the center crease. Finally fold the strip in half again and press so that all the raw edges are hidden.
Open up your binding and pin one side all around the holder. Make sure that the ends are folded under to hide the raw edges. Stitch the binding to your holder. Do the same for the other side.