


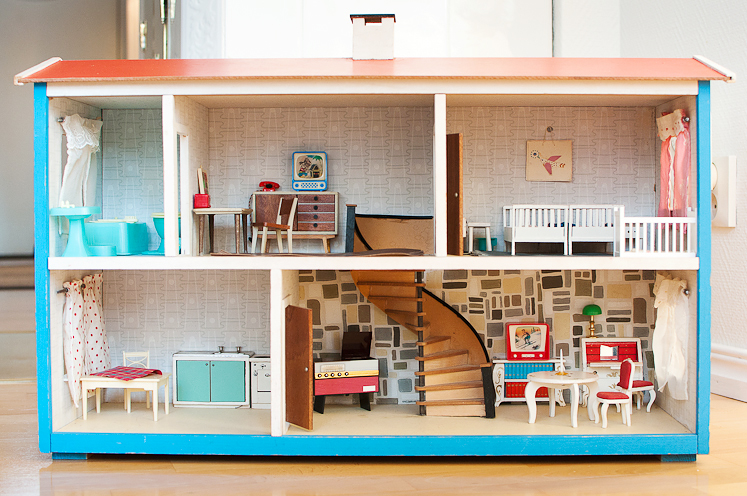
Are your kids taking over all the cardboard boxes that they see in your house? This kind of habit is both amusing and exasperating at the same time as this can take up space in your house. But instead of throwing their boxes away, why not show them how to transform old cardboard boxes in their very own dollhouse? This is actually a good way for you to bond with your child while helping her build a house for her dolls that she will enjoy.
- Choose your materials. When making a cardboard dollhouse, you need to start by choosing which of the available cardboard boxes are sturdy enough for your design. You should also think about what other items you would like to put in the dollhouse so that you can prepare the materials you will need like old clothes, art paper glue, and paint just to name a few.
- Cut the windows. The dollhouse won’t be complete without any windows so get your box cutter or bread knife and make some windows on one side of the cardboard box. This way, your child’s dolls can peek out of their windows.
- Make the roof. Fold any excess cardboard into half to create the roof of the doll house. Glue the edges into place. You can show the corrugated side of the cardboard on top to give it a nice detail.
- Create slits. If your daughter wants to have a doll house that has two floors, you will need to cut some slits on both sides of the cardboard so that you can insert the second floor. Glue the cardboard in place. You can cover the board with some colourful art paper if you like.
- Cover the box. A good looking doll house needs to have some decorations in it and what better way to do this than by using different colored art paper to make each layer of the house stand out? Let your daughter choose the colors or designs so they will have an input on how their doll house will look like.
- Add rooms. It would be nice to have a doll house that has different rooms in it so why not add some? Cut excess cardboards and install them into your doll house by gluing them in place.
- Make the furniture. No doll house will be complete without furniture. This is actually a nice project to give your daughter if she wants to participate in making her very own doll house to play with. Again, you will need your extra cardboard boxes to make these items starting with the bed. You will need three panels for this for the bed itself plus the two ends. Put them together to create a doll’s bed. Other furniture pieces that you should do include are the chairs, tables, cabinets, and the like. Just make sure that their sizes fit the cardboard doll house and the toys that your daughter will use.
- Add details. It’s all about the details when it comes to creating the best doll house for your daughter. This means making pillows, tiny kitchen utensils, even curtains too if you have the patience for this.

- Display it. Once everything has been glued together and all the details are in place, you can put your new cardboard doll house in an area that your daughter can play with any time she wants.
As you can see, you don’t have to spend hundreds of dollars just to give your daughter her very own doll house. With a little bit of creativity on your part and some cardboard boxes, you will be able to complete this in no time.